Ready to strap or click in for your next indoor cycling workout? Read our suggestions below to get the most out of your next training session and learn how to adjust your exercise bike easily!
The Importance of Correct Bike Set-Up
The correct bike set-up is essential to decreasing the risk of saddle soreness and injury. What exactly is the right bike set-up examines:
We will discuss below how to find the correct set-up to fit your needs.
Proper Spin Bike Seat Position & Height
So, how can you adjust a spin bike to your height?
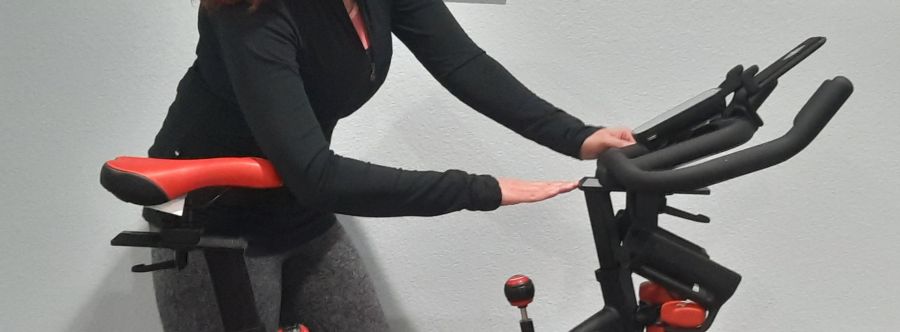
- When examining what height to have your saddle, you will want to stand next to your bike and locate your hips. This is not where you might wear your pants, but you want to place your hands above the top of your hip bones. The saddle should be in-line with this measurement.

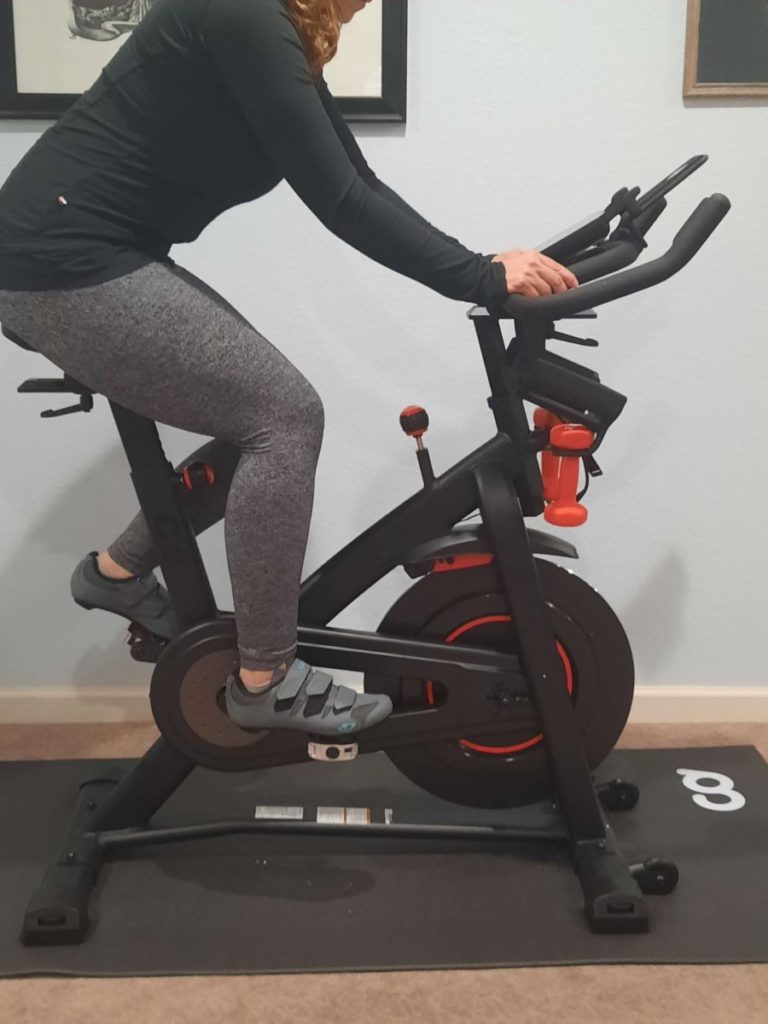
- The next step in the bike set-up process is to get on the bike and place your feet in either the clips or toe cages, depending on the type of shoe you plan to use. Rotate the pedals until one foot is at the bottom of the rotation. The knee of the leg in the bottom pedal position should contain a 25-30% bend. This bend will allow you to continue to pedal through the ball of your foot without any pointing at the bottom of the pedal stroke.
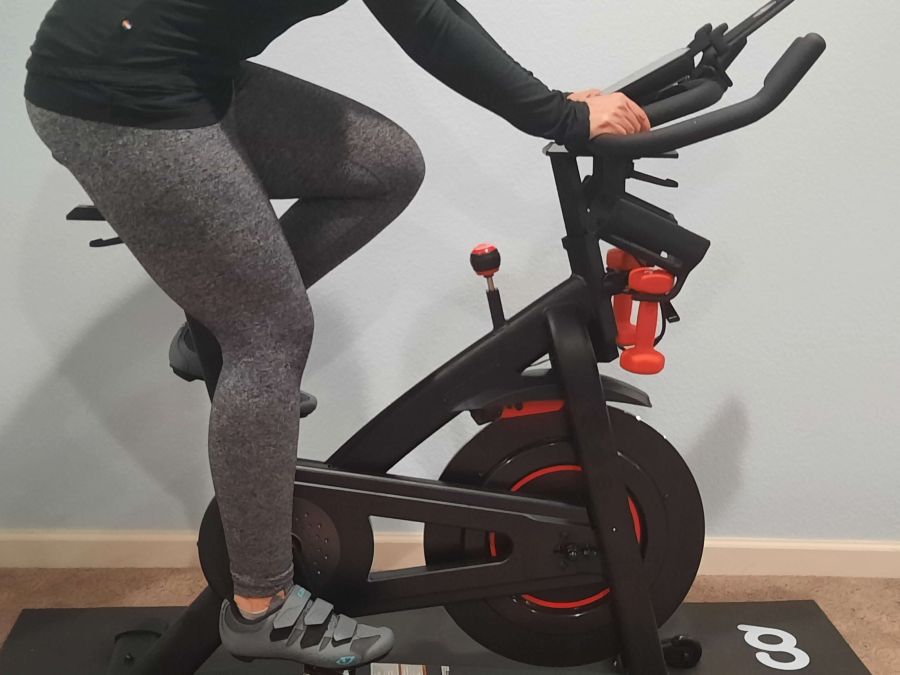
- After you have established the seat height, it is essential to check if the distance between the saddle and handlebars you estimated while off the bike. To check if your seat is in the correct position, bring your pedals parallel with the floor. Focus on the knee in the front. In this position, the knee should be between the ankle and the ball of the foot. If you find that the knee is behind the ankle or is going past the ball of the foot, an adjustment needs to be made.
Proper Handlebar Height and Placement
The next crucial part of how to set up your spin bike correctly is the handlebars.
If a rider is able, the handlebars should be approximately the same height as the saddle. If a rider is newer, has back issues, or is pregnant, their spin bike handlebars should be raised. If the handlebars include 4-way adjustability, smaller riders should move the handlebars closer to the saddle. A rider should not feel as if they have to reach for the handlebars. If they are reaching, this causes them to slouch and will increase saddle soreness.
Basic Hand Positions
Using specific hand positions for various riding positions helps maximize your performance while minimizing injury risk.
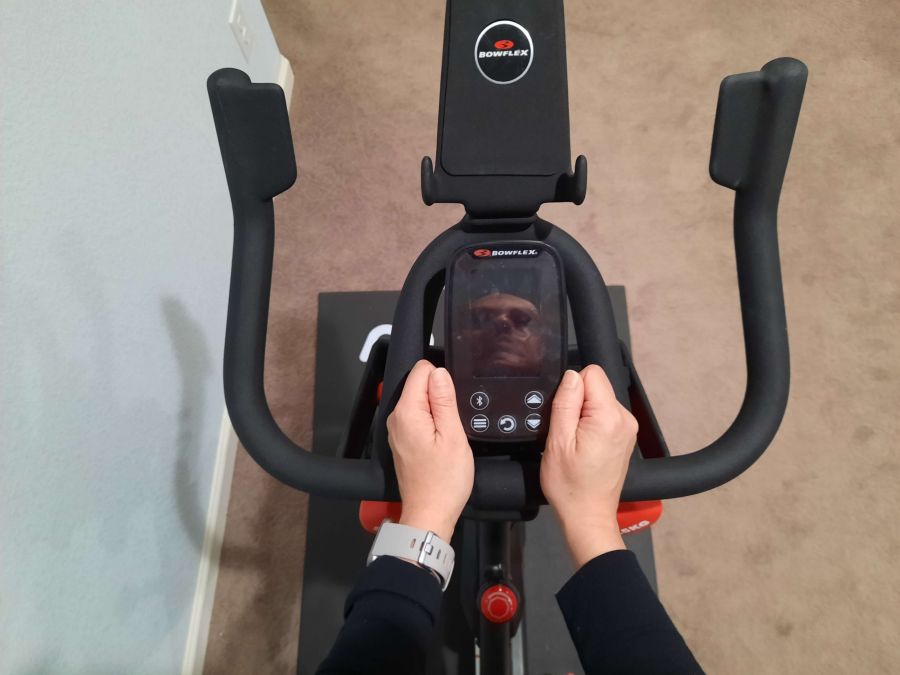
Hand Position 1
Use hand position 1 for warm-ups, cool-downs, and seated flats. Place your hands directly in front of you on the handlebars while making your hands into a loose fist.
Hand Position 2
Hand position 2, place your hands as if you were riding an outdoor bike. It is used for seated climbs, as well as flats both seated and standing.
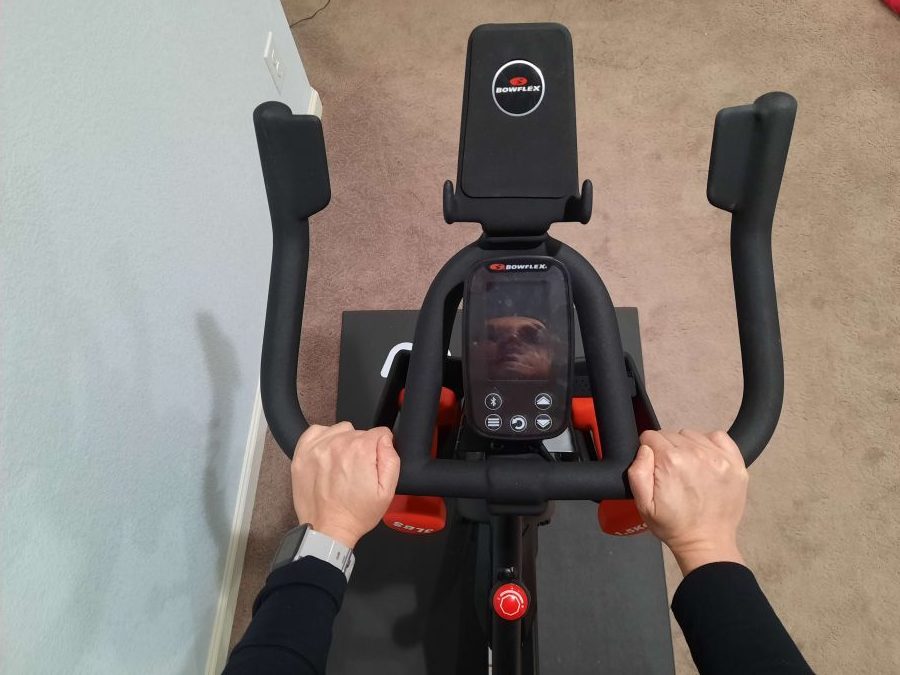
Hand Position 3
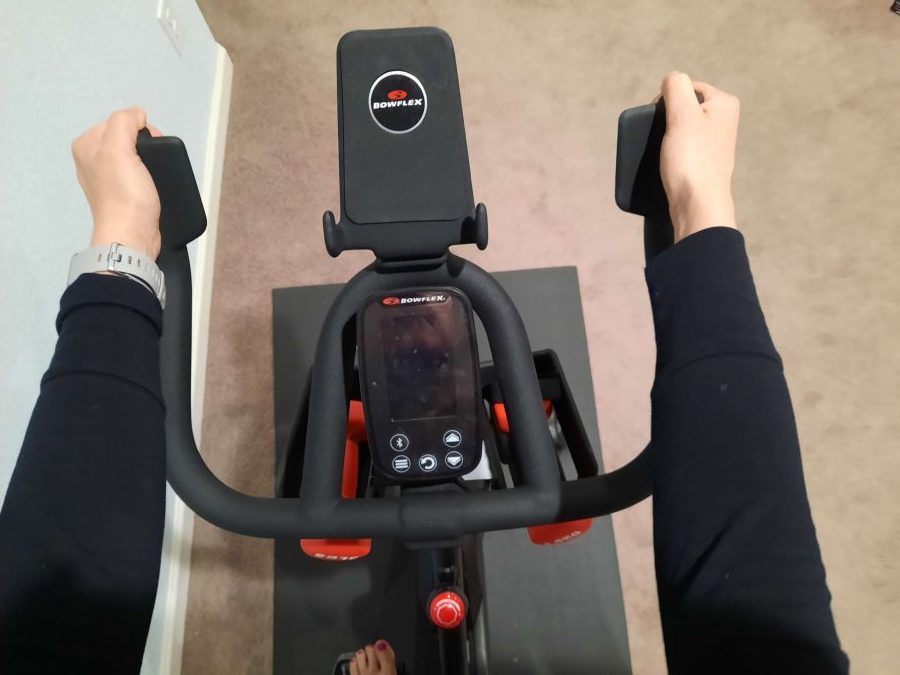
In hand position 3, thumbs come to the handlebars’ end, and the fingertips loosely wrap around the handlebars. Use this position for a standing climb. If hands are placed in the position while in the saddle, it increases saddle soreness.
How to Get the Most Out of Your Workout
An indoor cycling class can scorch up to 400-600 calories during a 60-minute class, depending on the intensity. This low-impact workout offers both cardio and strength benefits.
Understanding Cadence
Cadence plays a pivotal role in the intensity of the workout. Cadence, also known as rotations per minute, is how fast your pedals are turning per minute. Different terrains call for different cadences. For example, if you are performing speed work, your cadence will be between 80 and 100 RPMs. For climbs in and out of the saddle, cadences of 60-80 RPMs will occur. Today, many bikes have monitors that include your cadence, but what do you do if your bike doesn’t? You can perform a cadence check-in only 6 seconds. Pick either leg and count how many times that knee comes to the top of the pedal stroke in 6 seconds. Add a zero to the number that you counted, and you have found your cadence.
The Importance of Adding Resistance
Adding resistance can be intimidating, but it is the most critical aspect of increasing your workout intensity. Many newer riders mistake skimping on the amount of resistance they add to their bike. This not only decreases the effectiveness of the workout but also opens up the possibility for injury. A rider must have enough resistance on their bike to support the effort and their body. For instance, if a rider does not have enough resistance on their bike during a seated flat or sprint, they begin to bounce in the saddle. This increases the chance for saddle soreness while also adding pressure on the knees.
Knowing Your Rate of Perceived Exertion
The rate of perceived exertion is how hard that you feel your body is working. Rate of perceived exertion increases or decreases when changing cadence and resistance.
My riders use a scale of 1-10 to assess how hard they are working in my class. On the Rate of Perceived Exertion scale, three feels like a stroll in the park where you could maintain a conversation with a friend without being breathless. A ten on this scale is your max output and can only be maintained for less than 30 seconds. Understanding what these various exertion levels feel to you allows you to push harder and achieve better results. As you continue to get stronger as a rider, you will notice that you can ride at a higher intensity within your levels.
Inspiration
If you are struggling to find the inspiration for a great ride on your own, there are a few ways to help increase your enjoyment. Listening to music that you love when you ride helps to increase the intensity. Music also inspires different terrain suggestions based on the tempo and tone. Many indoor cycling class platforms are also available that include inspirational instructors.
If you are interested in trying a ride at home, feel free to try our sample class below for beginners. As a reminder, always consult your physician before starting any new fitness program.
30′ Minute Indoor Cycling Workout for Beginners
| Duration (Minutes) | Activity | Description | Cadence (RPM) | Rate of Perceived Exertion (RPE) |
|---|---|---|---|---|
| 5 | Seated Flat | This is your warm-up. This is a running cadence in the saddle, and your hands are in placed in position 1 or 2. Shoulders are down and relaxed, elbows bent. You should feel your heart rate gradually increasing. | 80-85 | 4 |
| 4 | Seated Climb | This is your first work song. Hands are in position 2, and your hips should be back in the saddle. Focus on pedaling through the ball of your foot. | 60-80 | 5 |
| 4 | Seated Flat | This is a running cadence in the saddle. Hands are in position 1 or 2. Shoulders are down and relaxed, elbows bent. | 85-95 | 5 or 6 |
| 5 | Standing Climb | Come out of the saddle to position 3. Thumbs at the end of your handlebars and fingers wrap. Remember to drive your hips back over top of the saddle. You should be grazing the saddle on every stroke. There should be enough resistance that it is difficult to pedal, and a side-to-side motion is needed to continue to drive the pedals. | 60-80 | 6 or 7 |
| 3 | Seated Flat | This is a faster running cadence in the saddle. Intervals of 1:1 will include a 30-second sprint followed by a 30-second recovery. Hands are in position 1 or 2. Shoulders are down and relaxed, elbows bent. Ensure that you have enough resistance on the bike and that you do not bounce. You should feel resistance on every pedal stroke. | 85-100 | 5 or 6 |
| 4 | Seated Climb | Resistance should be much heavier than in the previous track. Hands in position 2, and your hips should be back in the saddle. Focus on pedaling through the ball of your foot. | 60-80 | 5 or 6 |
| 5 | Seated Flat | This is a running cadence in the saddle. Hands are in position 1 or 2. Shoulders are down and relaxed, elbows bent. You should feel resistance on every pedal stroke. | 70-80 | 5 |
| 5 | Cool Down | Continue to pedal until your heart rate is low enough to where it is safe to stop your pedals. After your heart rate has returned to a regular rate, begin to stretch. Stretching is an essential component of any fitness activity. |
Frequently Asked Questions
How high should my spin bike handlebars be?
Is spinning a good way to lose weight?
Should you spin every day?
Will cycling make my thighs big and bulky?
Bottom Line
A proper bike set-up is the foundation to a successful indoor cycling workout. If saddle soreness becomes too prevalent in class, it impacts your intensity and desire to continue. Follow the suggestions above, and you are well on your way to a great workout!

I can’t get the proper Seat Height
Distance between the Saddle and Handlebars, and
Handlebar Height.. I’m 5”2 and short torso
Hi Maria,
What is your exact bike model? Some bikes, unfortunately, don’t have a great adjustability for handlebars and seat to accommodate shorter riders.
I can’t get the proper Seat Height
Distance between the Saddle and Handlebars, and
Handlebar Height.. I’m 5”2 and short torso
Hi Maria,
What is your exact bike model? Some bikes, unfortunately, don’t have a great adjustability for handlebars and seat to accommodate shorter riders.